The planning for my 'Sew Tasty' recipe book was very enjoyable and the prototype seems to work!
SKETCHBOOK
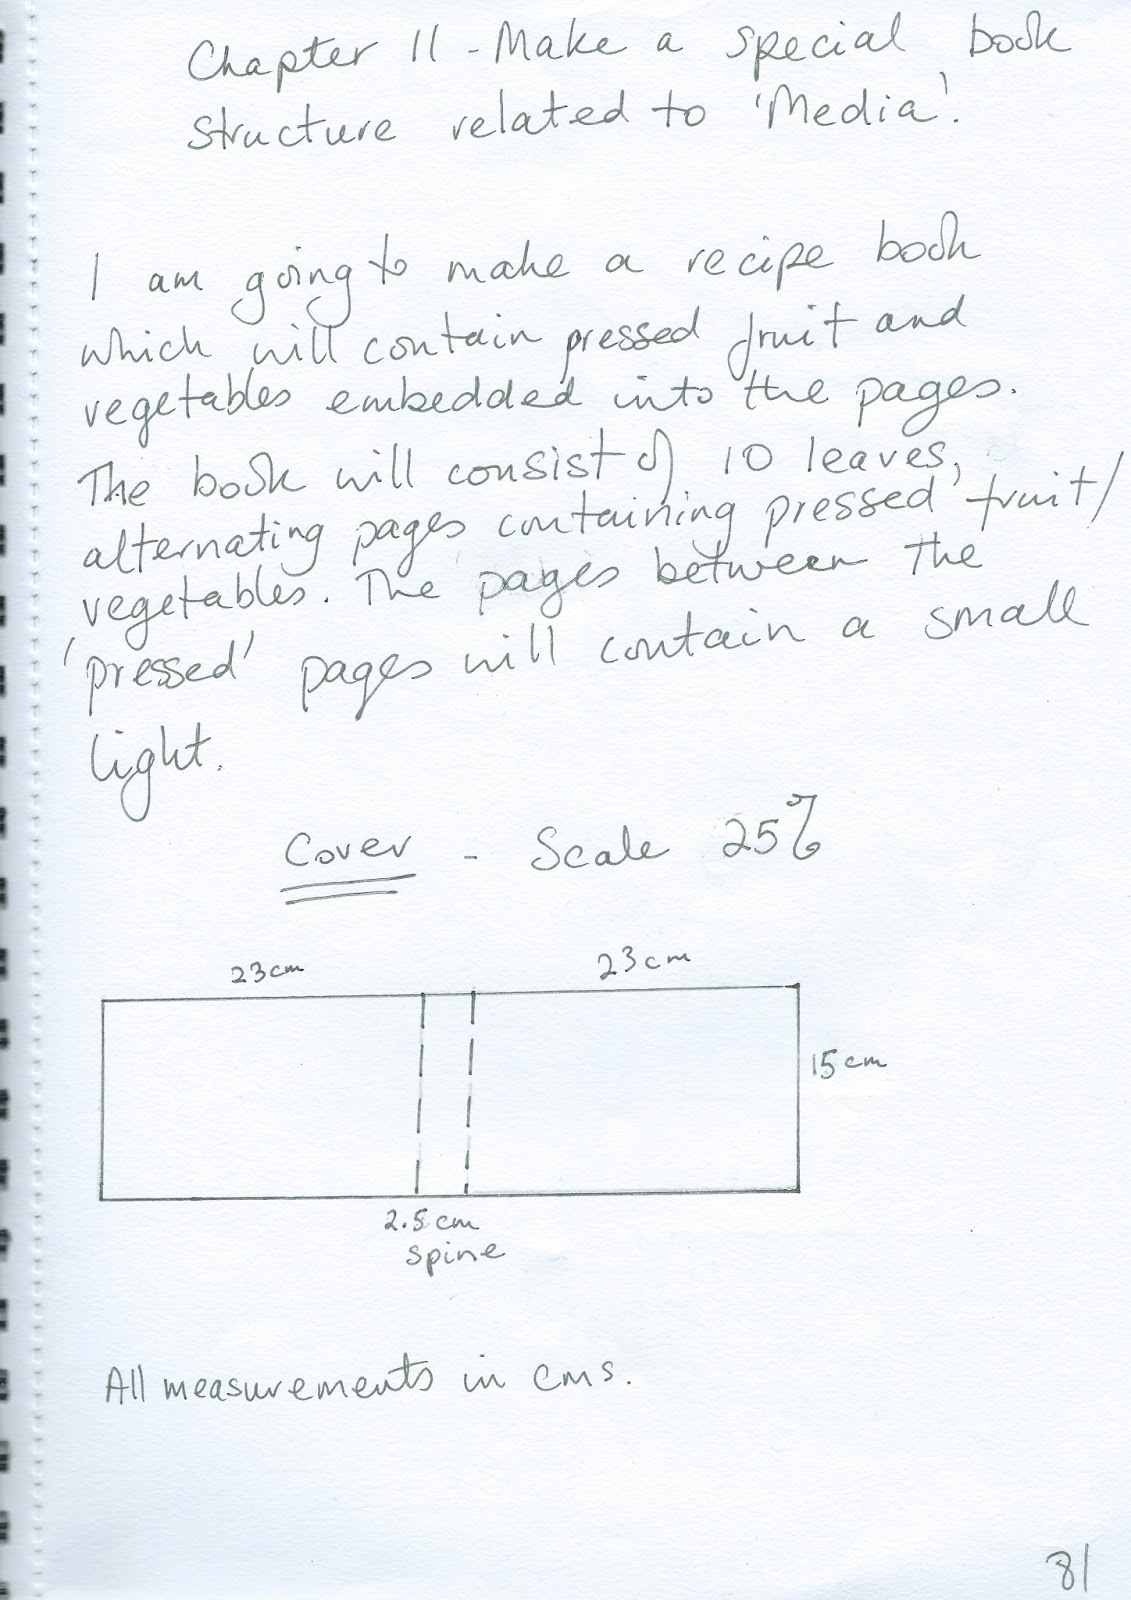
Page 81
Page 82
Page 83
Page 84
Page 85
Page 86
I will make one continuous piece of hand made paper that will form the cover. I plan to use a couple of metal grids bound together covered with plastic fly screen. It should work!
Page 87
Page 88
I have made a mock up of the lighting. The conductive thread will measure approximately 60 cms from the battery/switch to the fourth bulb, and 60 cms back again. The switch will be located in the last pamphlet. There will be a small opening at the base of the pamphlet to allow the battery to be changed.
I have made a video of the my prototype, I thought it would be easier to see it this way! The first and last pamphlets will form pockets to hold recipe cards and notes.
Page 89
Page 90
The large grid worked well and I was able to make a piece of paper measuring about 50 cms by 18 cms. Page 90 shows the hand-made paper book cover, made from 75% tissue paper and 25% crepe paper with cotton muslin in the centre. I experimented with paper pulp ratios. Pure tissue paper pulp was very brittle and pure crepe paper pulp was too soft. The resulting paper was firm and not too brittle and a good thickness, with the muslin through the centre of the 'sandwich'.
Procion dyed cotton and linen scrim, Book cover painted with Procion dyes using a fan-shaped brush.
Page 91
Pamphlets printed with acrylic paint and fresh carrot, cucumber, lemon and beetroot used as stamps.
Page 92
Details of lighting, using conductive thread. I tested out the circuit before sewing onto the pamphlets. I used 50 cms of thread from the battery to the last bulb, so one metre of conductive thread was required.
Page 93
Details of battery and switch at back of book.
Page 94
Front cover - drawn threads from cotton scrim laid over book cover. Vegetables placed on and through drawn threads, held in place with random zigzag machine embroidery. 'Sew Tasty' made from linen scrim drawn threads, couched in place. Cover edged with irregular buttonhole stitch. Book ties made from linen scrim drawn threads. Lemon, carrot and beetroot made from machine embroidery on soluble fabric. Cucumber slices made from two layers of organza bonda-webbed together then sewn with machine embroidery in centre and round edge. I felt this made the cucumber look transparent. The trial cucumber slice made on soluble fabric was too solid!
Page 95
Page 96
The threads in the linen scrim were withdrawn after the spine was sewn.
Page 96
Page 98
The text for the inside was printed onto cotton with an inkjet printer. The text was covered with freezer paper and the remaining cotton was painted with Procion dyes. The freezer paper was then removed. The triangular page was painted with Procion dyes and the text was couched in place, using drawn linen scrim threads. The recipe cards were made from dyed tissue paper pulp and machine stitched.
Page 99
Carrot page - the pressed vegetables are secured in place with circles of painted paper glued down.
Page 100
Cucumber page.
Page 101
Lemon page.
Page 102
Beetroot page.
Page 103
Inside back cover. The triangular page was painted with Procion dyes and the text was couched using drawn linen scrim thread. The Notes were made from tissue paper pulp and machine embroidered. A small hole was cut for the light switch. The bottom edge of the page near the spine has not been glued down so that the battery can be replaced.
I added lights to the pages to try and illuminate the pressed vegetables. When the pressed sheets are held up to the light they look like stained glass. Unfortunately, the battery is not strong enough to produce a bright light in daylight. In the dark however, the pages look wonderful. It has been very difficult to show the lighting effect well as my phone does not like filming in the dark, but the video below is my best effort so far!
I really enjoyed this chapter and it has filled me with ideas for my final assessment piece.
SKETCH BOOK
Page 71
Page 72
Page 73
Page 74
I enjoyed the book with the binding for the spine the most. It was quite tricky but a very useful exercise. The photos above show the process.
Page 75
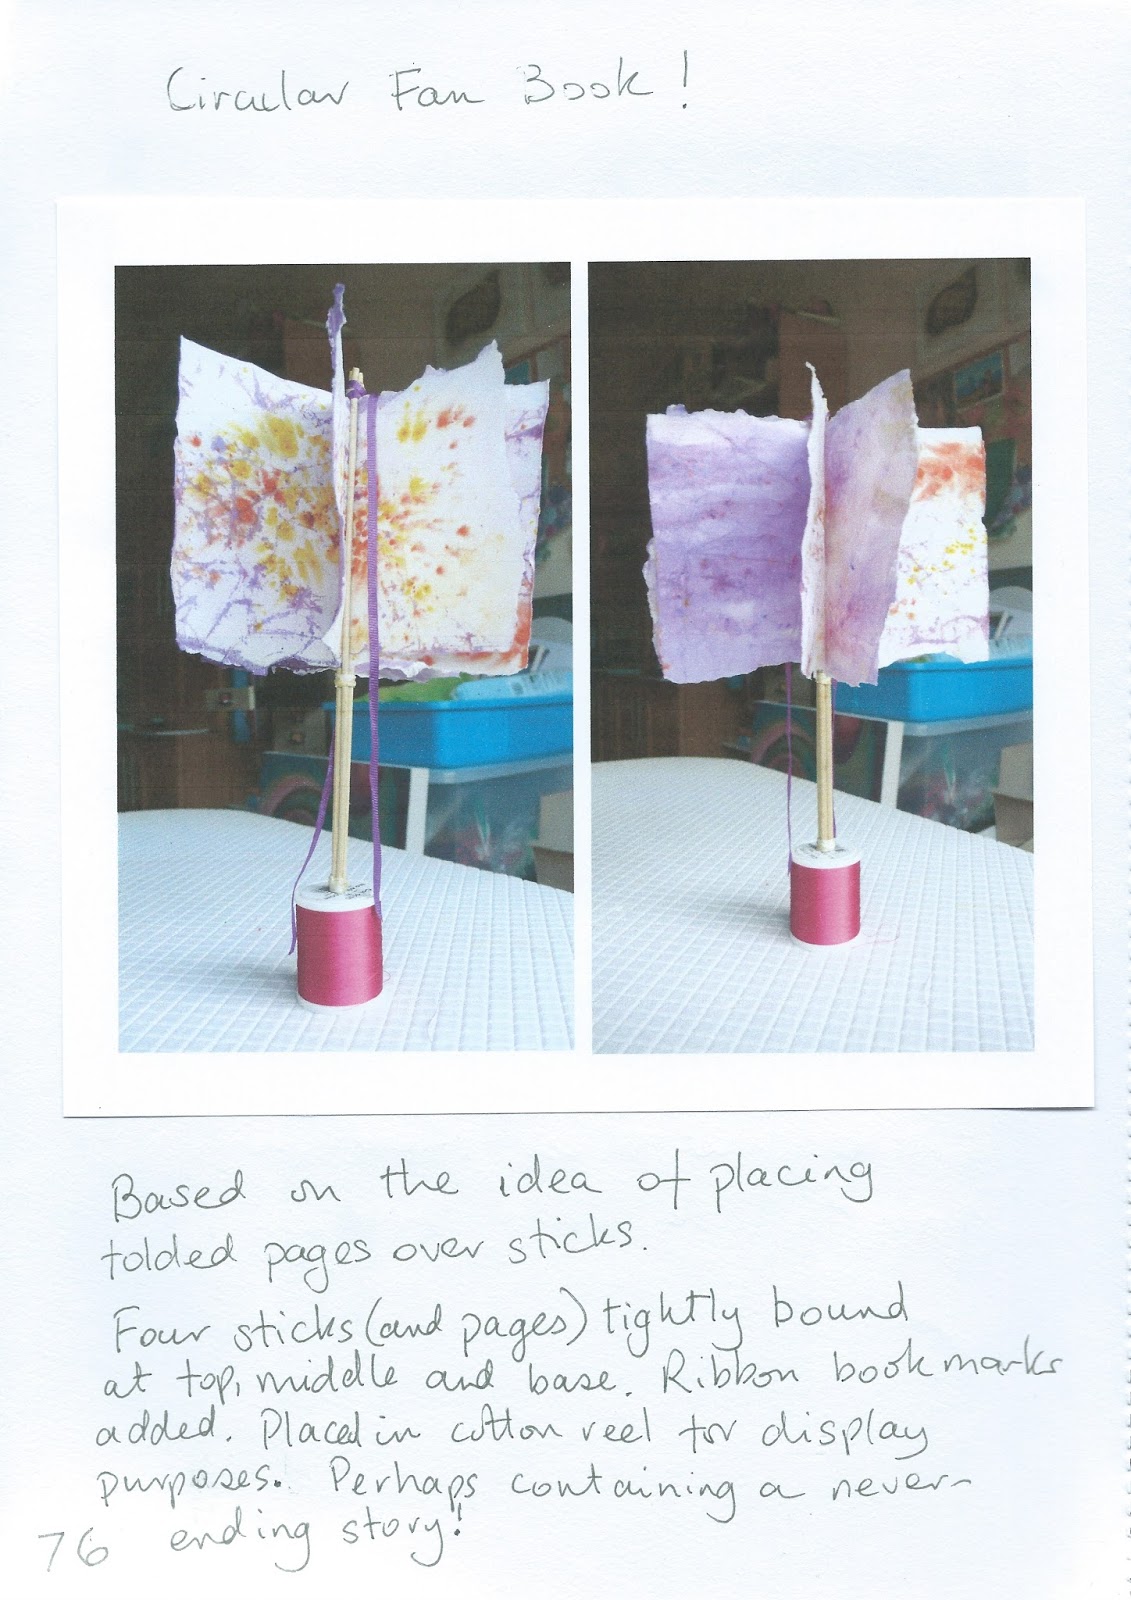
Page 76
A book for reading in a hot climate!
Page 77
Page 78
An imaginative book that makes you turn the pages!
Page 79
The shape of the pages is shown at the top of page 79. I tore the pages after I had stitched the spine with cord. I now know how to make the pages first!
Page 80
This is a concertina book. I like the longer back cover with the fastening on the front and may develop this further on my assessment piece.
I found this chapter quite hard to start but eventually got going.
SKETCH BOOK
Page 67
In all the samples here I have stitched into computer or napkin paper pulp.
Using a leather punch certainly made the stitching easy. I found that when stitching into paper by hand I had to make sure that my needle was perpendicular to the paper, otherwise the paper could fragment. I thought that using hooks and eyes might add interest when joining papers together, say on the corner of a box, but I would want to be able to paint the metal to an appropriate colour to blend in with the rest of the embroidery, so that it added texture to the piece. Probably hand stitching would also be necessary behind the hooks and eyes for additional stability.
Page 68
This is more experimentation. I liked the cord edged paper best. In the appropriate colours this might be quite useful to enhance my project.
I added the black tissue paper to enhance the centre of the piece. I like the way the colours blend together. The paper pulp was made from computer paper, then sprinkled with Brusho yellow. I was surprised how fragile it was compared to the tissue paper pulp which proved to be much easier to work with and was more robust.
Page 60
Last line on page 60 - Pink tissue paper stitched with running stitch. (Black tissue paper behind stamps). The tissue paper was much easier to stitch into.
Page 61
Adding paper to the vegetable net grid produced a firm base to stitch onto. Also the paper pulp was mainly created from tissue paper.
Page 62
Explanation below.
Page 63
Pink tissue paper used. The more I look at my 'lemon' paper, the more I like it. Perhaps this is becoming my new comfort zone!
Page 64
Explanation below.
Page 65
Green tissue paper pulp used. The morse code was printed onto ordinary computer paper (white background) and stitched down with yellow thread, then stitched in dark pink running stitch and French knots.
Page 66
Green tissue paper pulp and white computer paper pulp used. The paper was backed with Stitch and Tear and although you can probably not see it too clearly, the orange banded letters are slightly raised from the surface.