I have chosen to make a pair of beach anklets as my accessory for this module. I researched the basic shape to create the template and then looked at how to keep them in place whilst walking. Based on the theme of this module for spirals and movement, I looked at spirals associated with the sea, like shells, coral and waves.
SKETCH BOOK
 |
| Page 73 |
The coral shapes remind me of the drawing I made of Jake's ear on page 1 and 10.
 |
| Page 74 |
Basic anklet template shape to fit over the top of foot. To be held in place with elasticated cord around the ankle and over second toe. The anklet is designed to be worn on the beach, so does not have a sole.
 |
| Page 75 |
Any part of the design could extend beyond the basic template shape when the anklet is created.
 |
| Page 76 |
Experiments in creating coral florets. I sewed wire onto the edge of various fabrics. I tried out overlock stitch but it was not very successful. I found that zigzag (W3/L1) worked well. I stitched onto my dyed cottons and silks. I think silk is the most effective as it has a slight sheen to it. The fabric bottom right is silk fragments bonded between two layers of sheer nylon organza. It has a lovely shine to it but it is fairly fine so I may need to add another fabric under it when stitching on the coral florets.
 |
| Page 77 |
Coral floret made from wire stitched on to a piece of fruit net and shells painted in orange/copper acrylic paint.
 |
| Page 78 |
To hold the anklets in place on the foot I bought 1mm wide clear elasticated cord. I wanted to cover it in some way. First I machine zigzagged over it (cord on right). All appeared well but each time I stretched the elastic the stitching concertina'ed closer together. Next I painted a length of cord with acrylic paint (cord on left). This was very successful. I thought the paint might 'fracture' when I stretched the elastic but this didn't happen. I intend to create a 5 strand plait to go round the ankle, possibly each strand in a different shade, and a three strand plait around the second toe.
 |
| Page 79 |
I created a paper template and then made a mock-up with calico. I plaited the clear elastic cord. The anklet fitted over my foot and round my toe easily.
 |
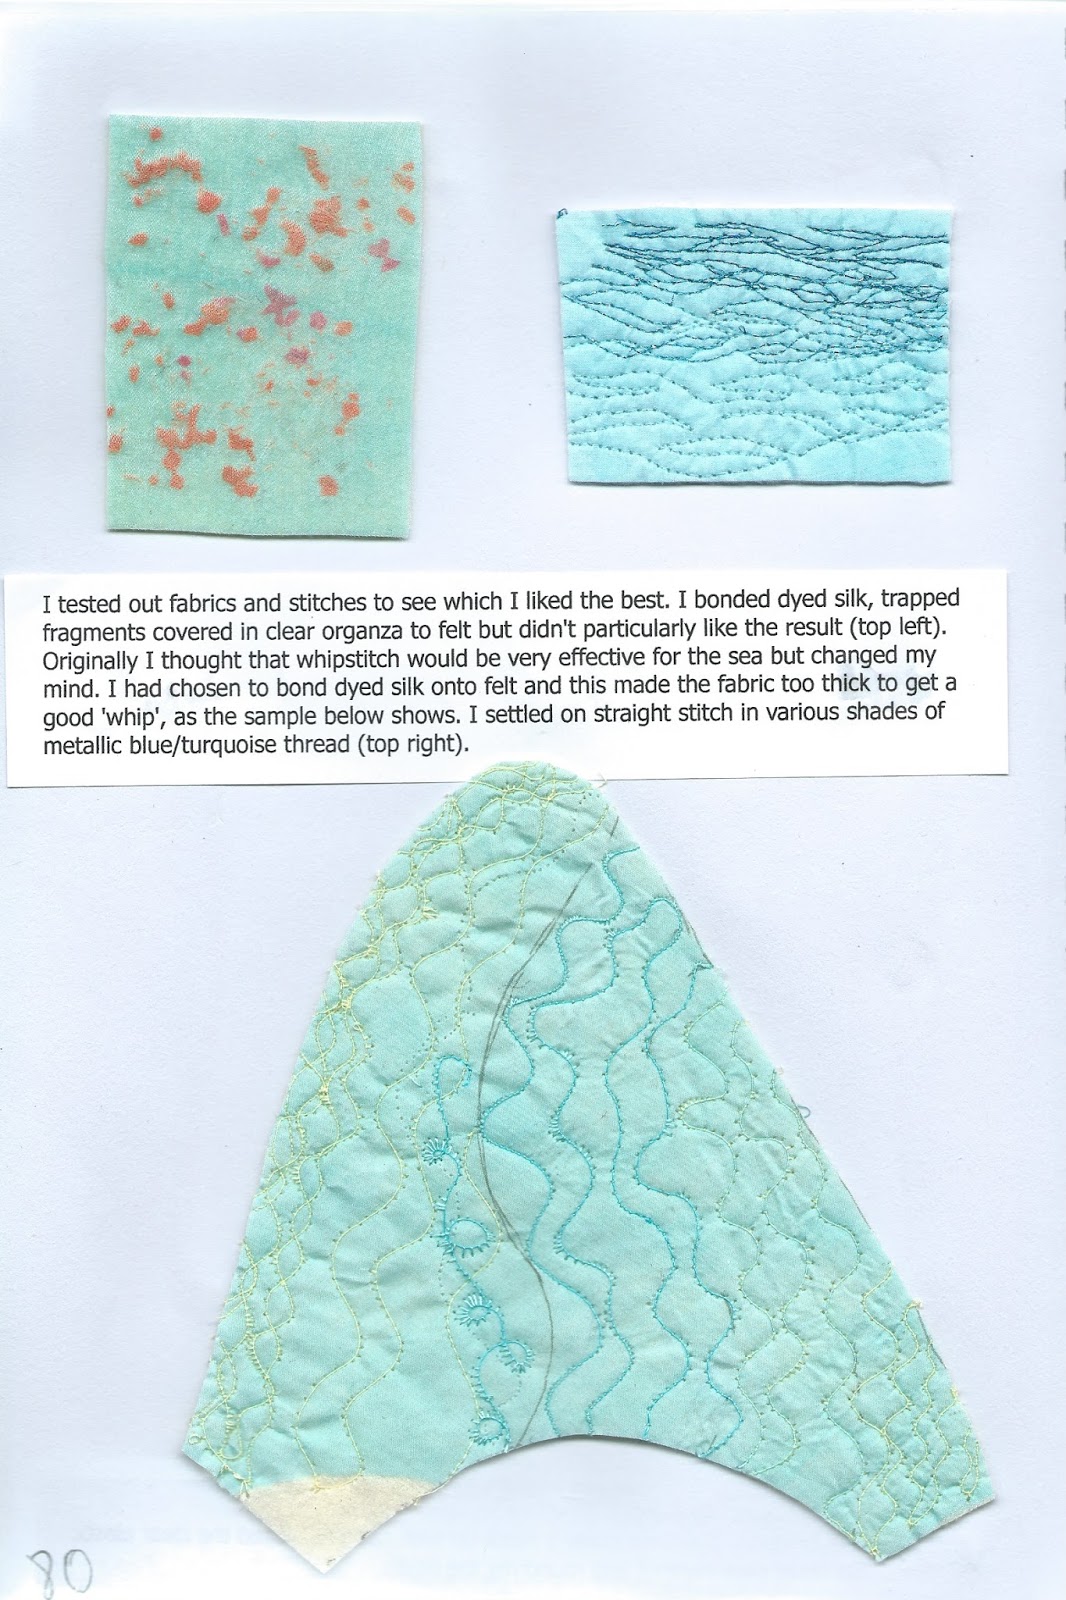
| Page 80 |
I tested out fabrics and stitches to see which I liked the best. I bonded dyed silk, trapped fragments covered in clear organza to felt but didn't particularly like the result (top left). Originally I thought that whipstitch would be very effective for the sea but changed my mind. I had chosen to bond dyed silk onto felt and this made the fabric too thick to get a good 'whip', as the sample shows. I settled on straight stitch in various shades of metallic blue/turquoise thread (top right).