C&G Certificate Module 3, Course Summary


EVALUATION OF FUNCTIONAL 3D EMBROIDERED ITEM

The completed embroidered assessment piece for Module Three is a pair of Beach Anklets based on the design topic of my grandson's ear!

How do you feel about the resulting conclusion?

I was very pleased with the result. Having drawn the ear and then created it in cardboard, I could see the potential for using the intertwining 
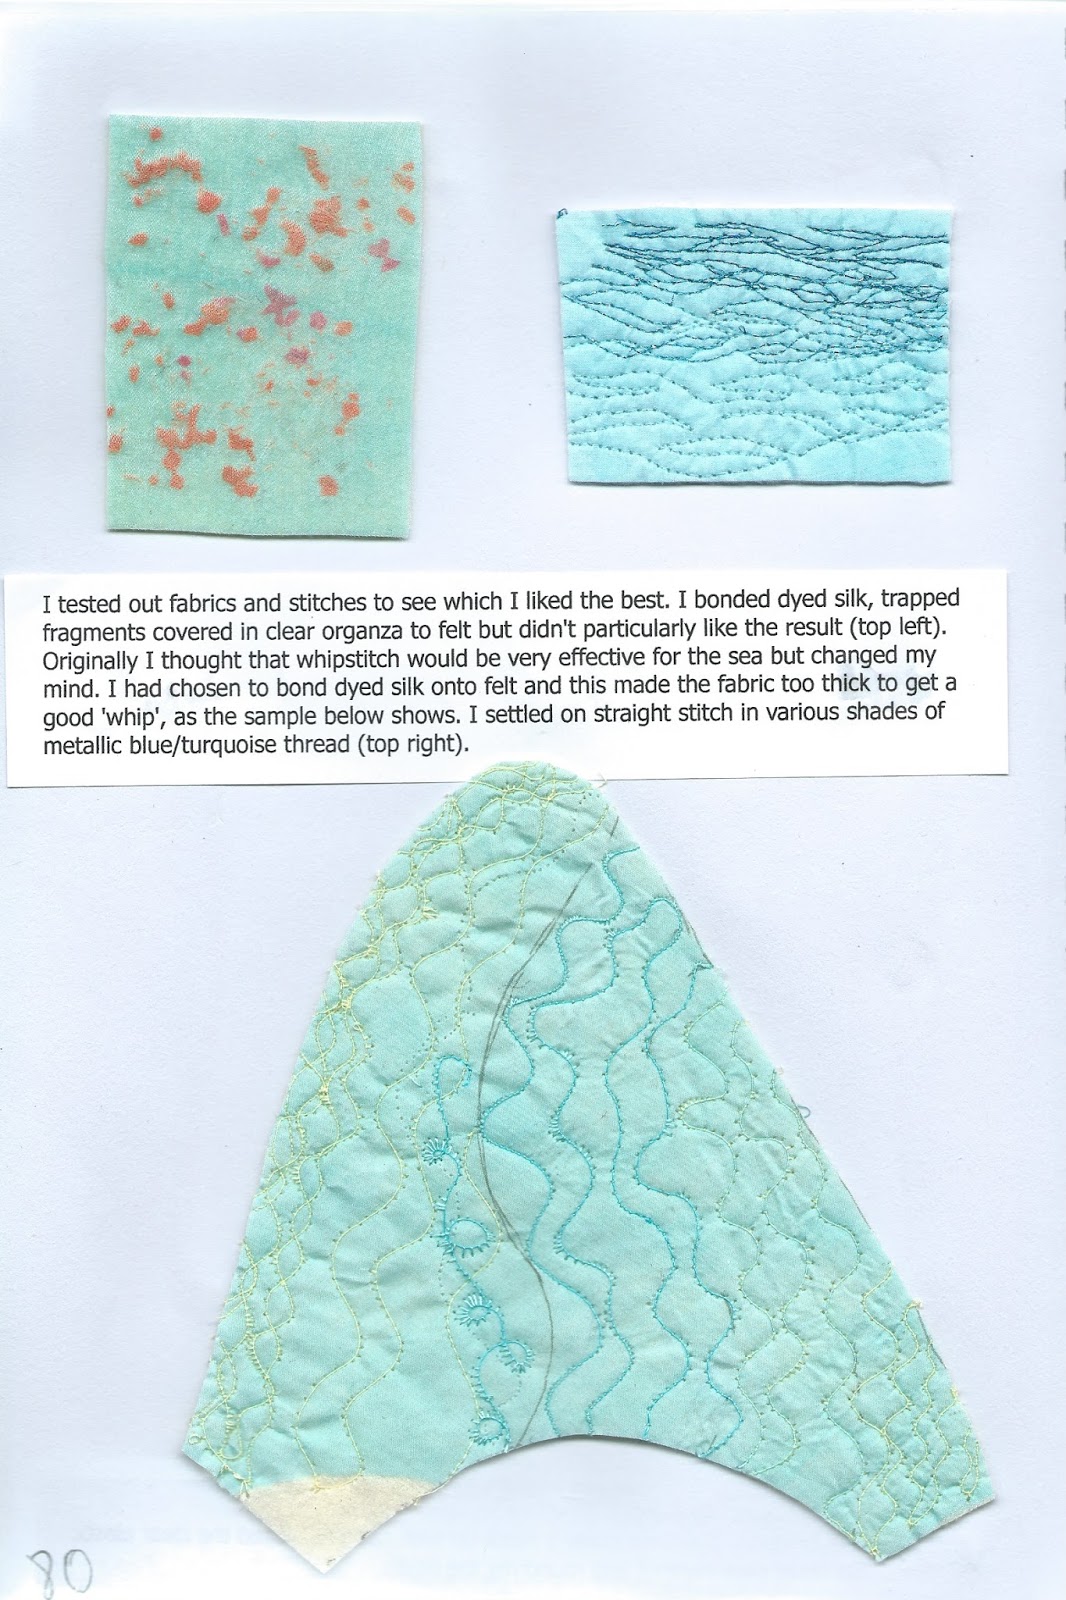
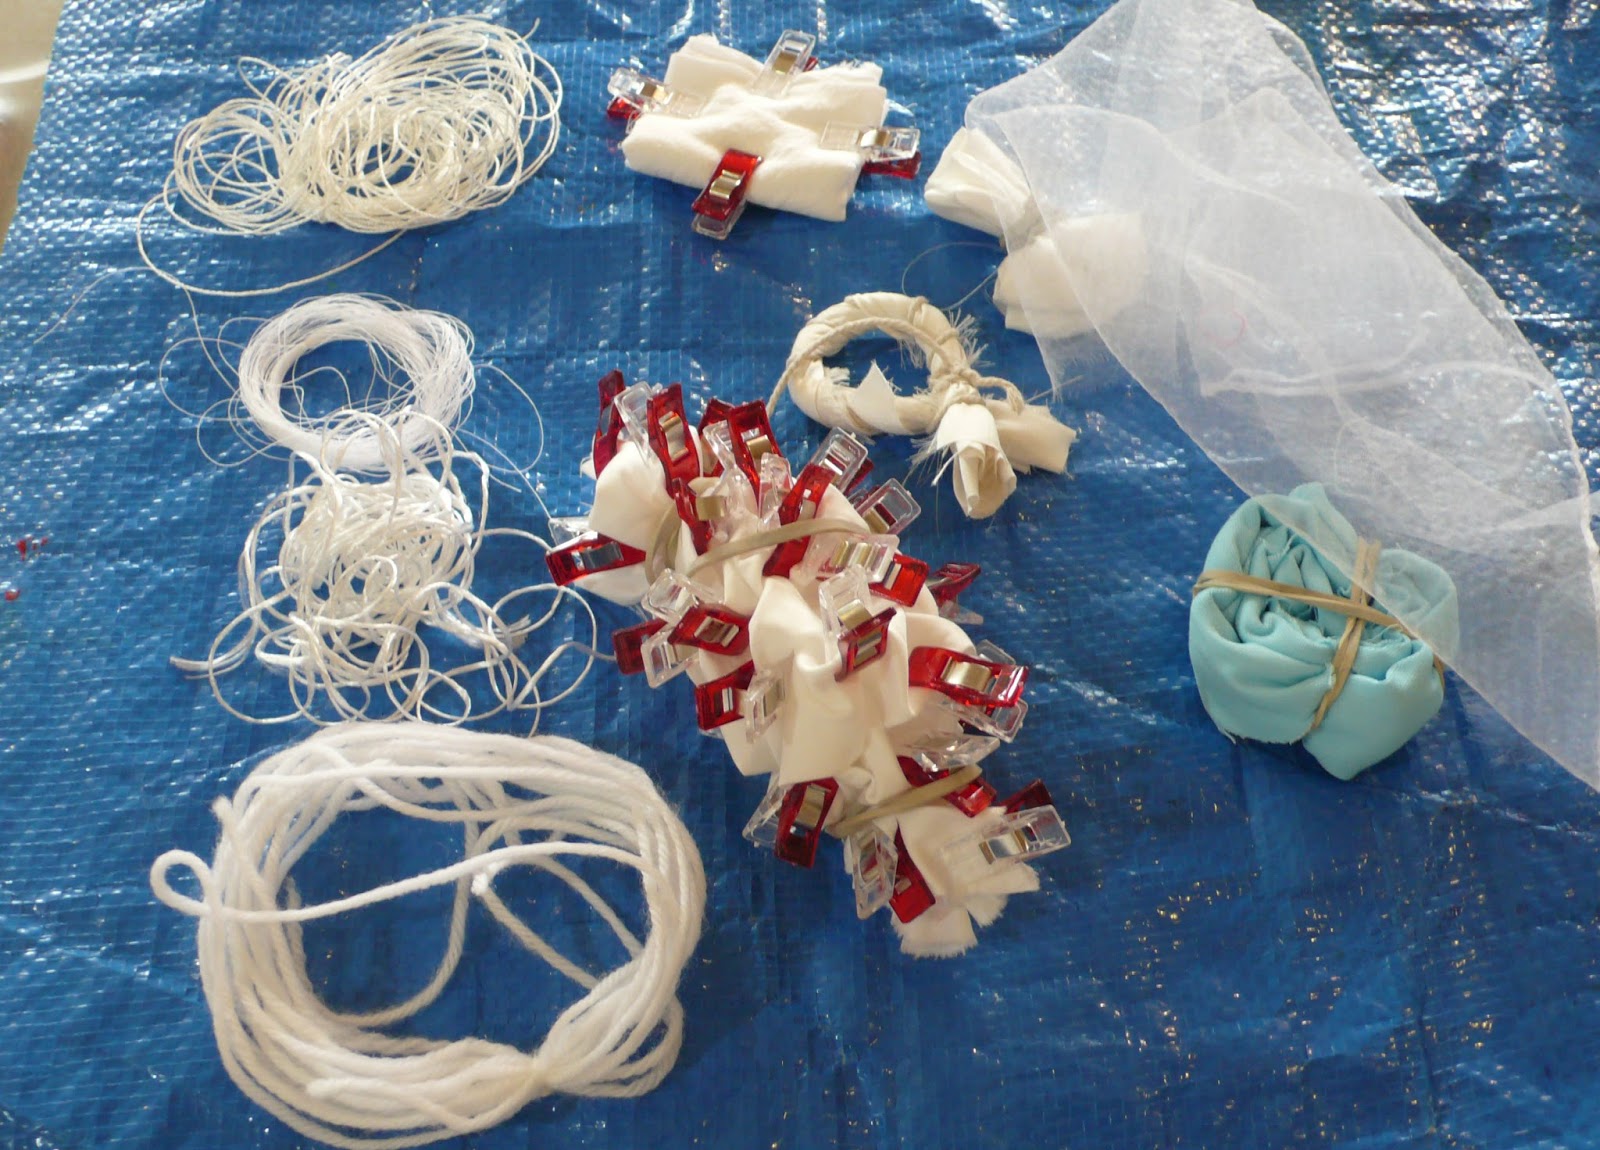
curves. It led me on to looking at coral and marine life. I used cord making and bead work to create the 'reef' and plaiting to secure the anklets in place. It was good to work in colour again and I loved the combination of orange and turquoise. I am glad I chose silk for the upper part of the anklet as it gives the 'sea' a lovely shimmer. Although the anklets are quite an unusual accessory to own, I think I will get good use out of them next summer.

Is it fit for purpose - give reasons?

I had to make sure that the elastic cords were tight enough to hold the anklet in place but not too tight so that I could not get them on. By slipping my foot through the ankle plait, there was enough stretch left for me to loop the 3 strand plait over my toe. The felt made the anklet slightly thicker than I would have liked but it was necessary to have a good base to stitch the embroidery on to. This meant that the left and right edges of the anklet did not have a great deal of curve over my instep. I sprayed a little fabric stiffener on the underside of the anklets and dried them over a tube. This gave them the right shape but did not alter the overall feel of the back of the anklet. When I wear them, they stay in place and look very decorative.

If you were asked to make it again, what changes would you make to the way you designed it an the way you made it?


Having stitched them with a felt lining, I would probably try to use a finer supporting fabric so that I would not have had the need to apply fabric stiffener to re-shape them. I would also have cut the underside fabric on the bias so that it would have curved without showing any wrinkles.


Timings, Costs and Health and Safety Log
TIMING

Date when design work was started 23/08/17 Completed 30/09/17

Date when embroidered item was started 16/10/17 Completed 31/10/17

Total of whole hours recorded in diary 198

Total number of hours spent working on design work 15

Total number of hours spent working on embroidery 20

Analysis

Date
Completed
Chapter
Materials Used
Hours
Cost £
Health and safety
07/05/17
1
Paper, printer ink, glue stick
16
3
Use of scissors, guillotine, glue stick
16/05/17
2
As above, card, tissue paper,
corregated paper, modelling clay, brusho inks, acrylic paint, PVA glue, glue stick
18
2
As above, use of craft knife, PVA glue
22/05/17
3
Cold water dyes, salt, acrylic paints, fabric medium, beads and shells, glue stick, fabric
10
10
Cold water dyes, use of craft knife
07/06/17
4
Dyed fabric, thread
33
1
Free machining, use of needle
22/06/17
5
String, thread, wire, wool
7.5
1
Free machining, use of needle
26/06/17
6
Thread, beads,
5
2
Needle, cord winder
31/07/17
7
Polystyrene, thread, string, metal hoops, tyvek, acrylic paint, feathers
12
2
Craft knife, heat gun, soldering iron, needle
27/07/17
8
Beads, shisha mirror, sequins, net, thread, tyvek
34
3
Needle
22/08/17
9
Dyed fabric, cords, tyvek, beads, polystyrene, beads, padding
22.5
3
Free machining, heat gun
30/09/17
10
Dyed silk, wire, bondaweb, soluble fabric, acrylic paint, elastic cord
15
2
Free machining,
31/10/17
11
Dyed silk, cord, shells, emb. thread, thread, felt, dyed cotton, elastic cord, fabric stiffener
20
7
Free machining, needle
02/11/17
12
Paper
5
-
Guillotine
TOTALS


198
36


STORAGE OF WORK, MATERIALS, TOOLS AND EQUIPMENT

ITEM STORAGE
Design work in progress In sealed plastic container, away for light, dust
Completed embroidery Wrap in acid free tissue paper
Completed design work In sketchbook
Papers for design work In sealed plastic container etc
Inks, dyes and paints Upright in cupboard
Glue, sprays As above
Embroidery work in progress In sealed plastic container etc
Fabrics In sealed plastic container etc
Threads Laid out in drawers
Beads In sealed plastic containers etc
Sewing machine Upright, covered at night
Electrical equipment Stored neatly in cupboard


HEALTH AND SAFETY

Soldering iron Hold at correct angle, mount in upturned flowerpot, use glass to protect work surface. Well ventilated room. Store away from children and pets.
Heat gun Hold at correct angle, use insulating board/fabric to protect work surface. Well ventilated room. Store away from children and pets.
Dyes Wear protective clothing. Work in well ventilated room. Store away from children and pets.
Guillotine Store away from children, do not allow build up of paper shreds.


C&G Certificate Module 3, Chapter 12 - Research Three Artists

SKETCH BOOK

Page 87


Page 88

Page 89

 Page 90

C&G Certificate Module 3, Chapter 11 - Composite Sheet with Completed Accessory


SKETCH BOOK

Page 81


Page 82
Composite Sheet, showing development from Jake's ear to coral reef.


Page 83

Page 84

Page 85

Page 86

C&G Certificate Module 3, Chapter 10 - Design an Accessory

I have chosen to make a pair of beach anklets as my accessory for this module. I researched the basic shape to create the template and then looked at how to keep them in place whilst walking.  Based on the theme of this module for spirals and movement, I looked at spirals associated with the sea, like shells, coral and waves.

SKETCH BOOK

Page 73
The coral shapes remind me of the drawing I made of Jake's ear on page 1 and 10.


Page 74
Basic anklet template shape to fit over the top of foot. To be held in place with elasticated cord around the ankle and over second toe. The anklet is designed to be worn on the beach, so does not have a sole.


Page 75
Any part of the design could extend beyond the basic template shape when the anklet is created.


Page 76
Experiments in creating coral florets. I sewed wire onto the edge of various fabrics. I tried out overlock stitch but it was not very successful. I found that zigzag (W3/L1) worked well. I stitched onto my dyed cottons and silks. I think silk is the most effective as it has a slight sheen to it. The fabric bottom right is silk fragments bonded between two layers of sheer nylon organza. It has a lovely shine to it but it is fairly fine so I may need to add another fabric under it when  stitching on the coral florets.


Page 77

Coral floret made from wire stitched on to a piece of fruit net and shells painted in orange/copper acrylic paint.


Page 78
To hold the anklets in place on the foot I bought 1mm wide clear elasticated cord. I wanted to cover it in some way. First I machine zigzagged over it (cord on right). All appeared well but each time I stretched the elastic the stitching concertina'ed closer together. Next I painted a length of cord with acrylic paint (cord on left). This was very successful. I thought the paint might 'fracture' when I stretched the elastic but this didn't happen. I intend to create a 5 strand plait to go round the ankle, possibly each strand in a different shade, and a three strand plait around the second toe.

Page 79

I created a paper template and then made a mock-up with calico. I plaited the clear elastic cord. The anklet fitted over my foot and round my toe easily.

Page 80


I tested out fabrics and stitches to see which I liked the best. I bonded dyed silk, trapped fragments covered in clear organza to felt but didn't particularly like the result (top left). Originally I thought that whipstitch would be very effective for the sea but changed my mind. I had chosen to bond dyed silk onto felt and this made the fabric too thick to get a good 'whip', as the sample shows. I settled on straight stitch in various shades of metallic blue/turquoise thread (top right).

C&G Certificate Module 3, Chapter 9 - A Resolved Sample

Creating this resolved sample took me on a long journey but helped me develop ideas which I plan to use in my assessment piece as well.

SKETCH BOOK

Page 61

Page 62

I played around with shapes to create movement.


Page 63
Further developments.


Page 64
Adding some ideas on texture.


Page 65
Moving away from my initial ideas but getting too complicated!


Page 66
Going back to the original sunflower shape, but in a much more simple design.


Page 67
Looking at colour, shape and shading, against a dyed cotton fabric.


Page 68
Again, experimenting with colour.

Page 69


Test sample using threads to create shading. Stitch - FME ZZ, W3, L2. The shapes look like swirling tassels.


Page 70

In the resolved sample I chose to use the orange shading to create the swirls. They looked very 'flat' when I had stitched them so I padded them from behind to create a 3D effect (Mod 1). I made an assortment of cords and plaits to lay between them and added 3 buttons to represent the heads of the tassels. I added small toggles to the end of the cords. It was very difficult to stretch the sample onto backing card and I had to resort to glueing the padded tassels in place to stretch it smooth. The sample is framed with card using a border of 5 cms on top and sides and 7 cms on the bottom.


Page 71
Close up of the centre of the resolved sample.

C&G Certificate Module 3, Chapter 8 - Beads

I loved creating the sampler but found the fringing very fiddly!

SKETCH BOOK


Page 57

I used a selection of commercial beads, some of which I painted along with found objects, hand-made beads and painted straws. Unfortunately my thumb can be seen in the mirror!


Page 58

Page 59

C&G Certificate Module 3, Chapter 7 - Simple Button Making

I really enjoyed making these buttons and toggles. It has filled me with ideas for future projects.

SKETCH BOOK
Page 55
 I used hand-dyed cord, a fruit net bag (again), sheer polyester, machine cord and ribbon to wrap shapes covered in fabric. The Dorset Buttons are slightly more traditional.


Page 56
Using a heat gun and soldering iron I have produced some very colourful toggles. I particularly liked wrapping metallic thread over the tyvek and fruit net and watching the underneath layers shrink away. The feather toggle looks like a fitted evening gown with a voluminous skirt!

C&G Certificate Module 3, Chapter 6 - Simple Tassels

I used wool, cotton thread, hand-dyed cord and metallic thread to make the tassels.

SKETCH BOOK

Page 53

Page 54
I unravelled  some hand-made cord to make the tassel on the left. The skirt is made from polyester threads. The beaded tassel on the right has a silk covered head, with a hand-made cord handle.

C&G Certificate Module 3, Chapter 5 - Making Cords

I have made machine cords before but this time I have been more experimental, using a variety of cores, including the orange net bags that oranges are sold in.

SKETCH BOOK

Page 45

Page 46

Page 47
I used some commercial cords, beads and sari ribbons for these cords.


Page 49
 I made these cords using a cord winder. I used 4 separate lengths of cotton thread and wool to make them.


Page 50

Page 51

C&G Certificate Module 3, Chapter 4 - Decorate with Stitchery


SKETCH BOOK

Page 41
 The background fabric is the dyed and monoprinted cotton from page 32. I started by sewing swirls using whipstitch, with a variegated thread in the bobbin and top thread. I then stitched my dyed synthetic filament thread into four large spirals, using cable stitch. Next I stitched two zigzag spirals within the cable stitch, using two threads (orange and turquoise) as the upper thread. I altered the size of the zigzag, so that it was narrow in the centre of the spiral and wider at the edge. It is mounted on black felt, which I think sets it off well.


Page 42
I forgot to scan the background fabric when doing Chapter 3. It started out as a section from page 36. I then monoprinted it using a piece of crocheted lace to remove parts of the orange and turquoise acrylic paint. I used a paintbrush to make a swirl down the centre of the gelliplate before taking a print. I really liked the background print so decided not to put too much stitching on it. I have tried to create a swirling ribbon, looking at the front and back. I wrapped six strands of variegated embroidery thread with two strands of the same thread and then hand-couched the thread into spirals on the 'front' of the ribbon. On the 'reverse' of the ribbon I free machine stitched spirals with variegated machine thread. I sewed stem stitch on the edge of the ribbon, using a strand of dark orange and dark turquoise for the 'front' of the ribbon and a strand of light orange and light turquoise for the 'back' of the ribbon.


Page 43
I was very disappointed with this monoprint (page 39). I couldn't decide what to do with it as it was so garish and I nearly abandoned it. After several false starts I decided to see how many spiral shapes I could get into it. I started on the outside with whip stitch and then switched to free-machine embroidery. I could see I had two spirals to work with so I chose light orange colours on the outer spiral gradually changing to darker threads as it approached the centre. For the inner spiral I started with dark turquoise at the outer edge and changed to lighter threads as it approached the centre. I used a range of threads including plain and variegated ones.


Page 44
I made this monoprint by adding orange and turquoise acrylic paint to the gelliplate and then making swirls with my finger, (page 38). I decided to keep the stitching simple as there were so many swirls.  I used variations of straight stitch and blanket stitch. I learnt some new stitches - crossed blanket stitch, loop stitch and arrow stitch. I think that you definitely get a feeling of movement is the stitching. I used lighter coloured threads for the swirls in the background and brighter colours in the foreground. In addition the background threads generally consist of fewer strands than those in the foreground. I also mixed orange and turquoise threads together.

C&G Certificate Module 3, Chapter 3 - Fabrics and Threads

I chose turquoise/blue and orange/gold without realising how many fabrics and threads I had in the colour range!

I enjoyed tie-dyeing in Module 2, so it was fun to  have another go, this time with colours. I dyed plain white cottons and silks as well as some of the plain coloured fabrics I had in my stash. I used Dylon again. The cottons took the dye very well and the silks produced more muted colours, but still very attractive.


SKETCH BOOK

Page 29
It's all in the preparation!


Page 30
Dip dyed and random dyed cotton and silk fabrics and threads.


Page 31
Various beads, shells and sequins coloured with blue and orange acrylic paint.


Page 32
White cotton  dyed turquoise.


Page 33
White cotton dyed orange.


Page 34
Medium weight white silk dipped into orange dye. I was surprised that the colour appears so pink.


Page 35
The same process as on page 34, this time with turquoise dye. The colour has stayed true to the original.


Page 36
Blue cotton (from my stash) dip dyed with orange.


Page 37
White habotai silk, dip dyed with turquoise and orange. Again the orange appears pink on the silk.


Page 38
White cotton, monoprinted with turquoise and orange acrylic paint and fabric medium.


Page 39
Dyed orange fabric from page 33 monoprinted with turquoise, using a fossil shaped mask.


Page 40
Turquoise cotton fabric from page 32, monoprinted with yellow swirls.