C&G Certificate Module 1, Chapter 12 - Resolved Sample

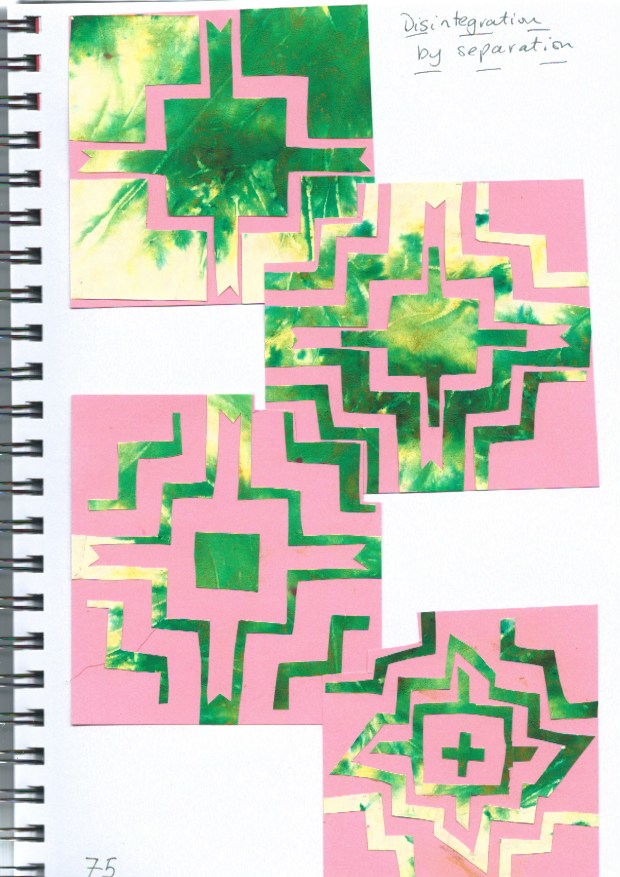
I started to create my resolved sample by using my cross shape and breaking it and reducing it in size (Design 1).

Design 1
 Next, I cut out the shapes in paper (Design 2).
Design 2
 I decided to add some distortion to the shape (Design 3).

Design 3

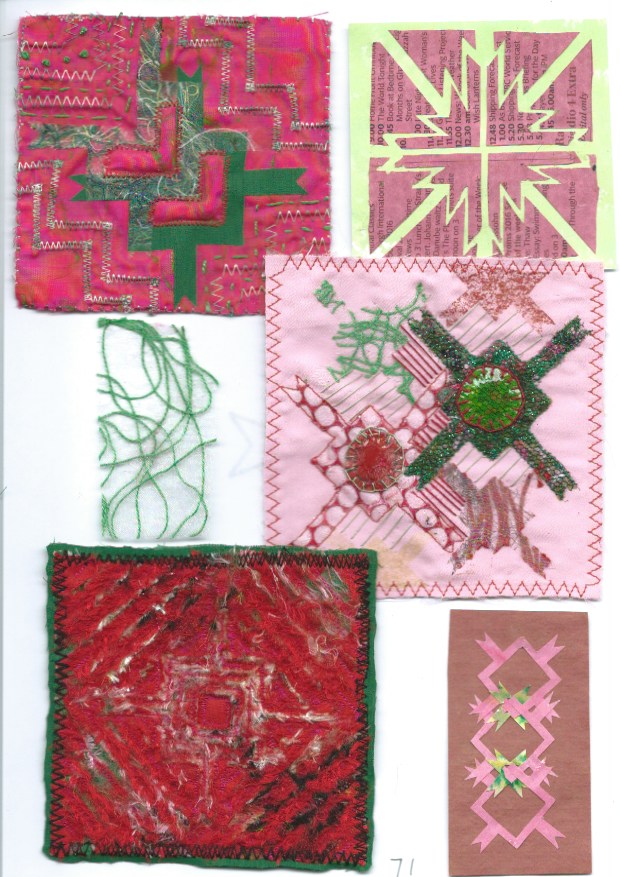
I started to look at background fabrics (Designs 4 and 5).

Design 4


Design 5
 I decided I didn't like the design, so started again! (Design 6). I wanted to create the effect of the shapes disappearing into the centre of the design, disintegrated as they got closer to the middle. The shapes on the outside edges are distorted as they fall to the centre. The main green shape is above the centre but hasn't started to fall yet.

Design 6
 I wanted to create a background fabric that became lighter in colour in the centre. I used green transfer paint on silk. I knew I would not get a very dark print first time round so I printed again over the first print, this time with a circle cut out of the centre of the paper.  Next I made two new stamps. Using all three stamps I have tried to create the effect of distance, using the smallest stamp in the centre and the largest on the edge. (Design 7)

Design 7
I cut out paper shapes to see if the effect I was hoping to achieve had worked. I  am pleased with the result, (Design 8). It is a shame that the the background print has not shown up very well in the scan.

Design 8
I decided that the background fabric was too pale so I used silk paints on white silk and printed with my lamb chop stamps again. The centre is pale green with darker green around the edges (Design 9).

Design 9


SKETCH BOOK


Scanned Image of Resolved Sample
I made a new frame for the mounted version. I stiffened the craft vilene by painting it with diluted PVA glue and then painted it in grey, red, green and white. This is slightly lighter than the first version, to reduce the difference in colour between the frame and the mount. I changed the shape of the frame to keep it in the style of the cross shape I have been working with throughout this module.
Photograph of Mounted Resolved Sample against a Red Background

C&G Certificate Module 1, Chapter 11 - Resolved Sample Preparation - Growth and Disintegration

I have been thinking about words that relate to growth and disintegration whilst working through the last two chapters. Growth - bold, new, strong, symmetric. Disintegration - pale, fragmented, asymmetric. Padding and bright colours show growth whereas separated or fragmented designs show disintegration.

In Chapter 11, I have shown disintegration by manipulation of the surface of papers and fabrics by rubbing, cutting (with scissors and soldering iron), shrinking, fraying and stabbing.

On Page 81, I had hoped that by removing layers of the same coloured organdie, the colour change from the edge to the centre would be more pronounced. I was still pleased with the result but perhaps I should have used a range of pinks rather than sticking to one shade. The threads of linen coming out of the centre could indicate disintegration (mould, fungus) or perhaps growth (new shoots).

SKETCH BOOK


C&G Certificate Module 1, Chapter 10 - Making Ripples - Chenille or Slashed Reverse Appliqué


I have done some slashing before and made a bag out of old bras! A friend asked if it was various shades of grey, fortunately not! After slashing, I went over the fabric with an embellisher so that the finish is smoother but the the colours can be clearly seen.

In Chapter 10, I used the sewing machine to create the lines of stitching, going over the rows twice, using free machine embroidery. I prefer the second sample, (Sample 20) and enjoyed the way the patterns emerged as the mixed layers of colours were revealed.

It was fun to use the soldering iron. I think I got over involved in the design and lost sight of creating a ripple effect but cut back to reveal the different layers and used the soldering iron to make a variety of marks.

My composite pages spread across page 70 and 71 and reflect how the two designs I have used repeatedly have emerged and developed - lamb chops and two versions of a Maltese cross, to show form and colour.

SKETCH BOOK


C&G Certificate Module 1, Chapter 9 - Reverse Appliqué - Traditional and Contemporary Methods

Having tried traditional appliqué by hand and contemporary appliqué by machine, I must admit that I found the modern method a lot easier and more enjoyable. However if I was living in a tropical paradise with time on my hands, I may think differently.  Having finished Sample 17 and 18, I think they would have looked better if I had laid out the incomplete pieces of fabric in a more random style, to avoid the 'row/stripes', particularly in Sample 17.


SKETCH BOOK